
A beautiful wood finish can completely change the look of furniture, doors, and wooden surfaces in your home. When done right, it enhances the natural grain, adds colour, and protects the wood for years. Varnish and stain play a big role in this process. But many people feel unsure about how to use them properly. Don’t worry. This step-by-step guide will walk you through the process in simple and easy words.
Step 1: Choose the Right Wood Stain
The first step to a perfect finish is selecting the right wood stain. Stains come in different shades, from light natural tones to deep, rich colours. Some stains highlight the grain, while others add a stronger colour.
Think about where the wood will be used. Lighter stains work well for a modern look, while darker shades add warmth and depth. Always test the stain on a small, hidden area before applying it fully.
This helps you see the final colour clearly.
Step 2: Prepare the Wood Surface Properly
Surface preparation is the most important step in achieving a smooth wood finish. Start by sanding the wood with medium-grit sandpaper. This removes rough spots, old paint, or uneven areas.
After that, use fine-grit sandpaper to make the surface smooth. Always sand in the direction of the wood grain. Once done, clean the surface with a dry cloth to remove all dust.
A clean and smooth surface allows the stain and varnish to work better.
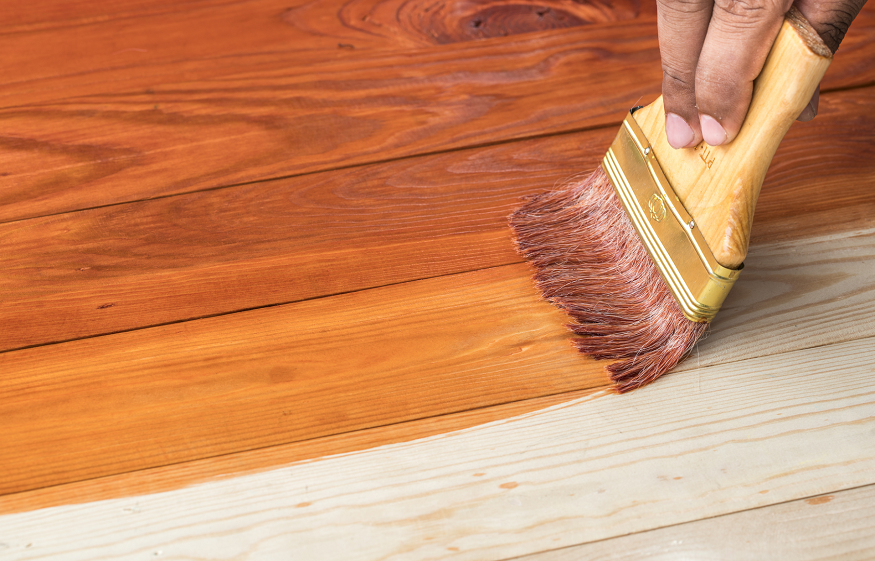
Step 3: Apply the Wood Stain Evenly
Now it’s time to apply the wood stain. Use a clean brush or cloth and apply the stain evenly along the grain. Do not overload the brush. Thin and even application gives the best results.
Let the stain sit for a few minutes, then wipe off the excess with a clean cloth. This step controls how dark the colour becomes. Allow the stained wood to dry completely before moving to the next step.
Drying time is important. Don’t rush it.
Read More: The Hidden Bond: A Comprehensive Guide to
Step 4: Light Sanding After Staining
Once the stain is dry, lightly sand the surface using very fine sandpaper. This removes raised wood fibres and makes the surface extra smooth.
After sanding, clean the surface again to remove dust. This small step makes a big difference in the final finish.
Step 5: Apply the Wood Varnish
This is where protection and shine come in. Wood varnish forms a clear protective layer over the stained surface. It protects the wood from moisture, scratches, and daily wear.
Apply the varnish using a clean brush, following the direction of the grain. Use thin coats for a smooth finish. Thick layers can cause bubbles and uneven drying.
Let each coat dry fully before applying the next one.
Step 6: Multiple Coats for a Strong Finish
For a durable wood finish, apply at least two to three coats of wood varnish. Lightly sand between each coat to maintain smoothness.
More coats mean better protection and longer life. However, always allow proper drying time between coats for best results.
Step 7: Final Drying and Curing
After the final coat, allow the wood to dry completely. Avoid using the surface for at least 24 to 48 hours. Full curing may take a few days, but it’s worth the wait.
Once cured, the wood will look rich, smooth, and well-protected.
Read More: Top Bamboo Sheets That Keep Hot Sleepers Cool All
Final Thoughts
Achieving the perfect wood finish with wood stain and wood varnish is all about patience and proper steps. From choosing the right stain to applying varnish carefully, every step matters.
With the right tools, good preparation, and a little time, you can give your wooden surfaces a professional-looking finish that enhances beauty and durability for years to come.