
A wine rack is not just storage; it has more style and can keep bottles safe from breaking. The good news? You do not need to be a trained carpenter to make one. All you need is a couple of tools, a few basic materials and a little time to make a wooden wine storage that adds more charm to your house.
How can you create your own?
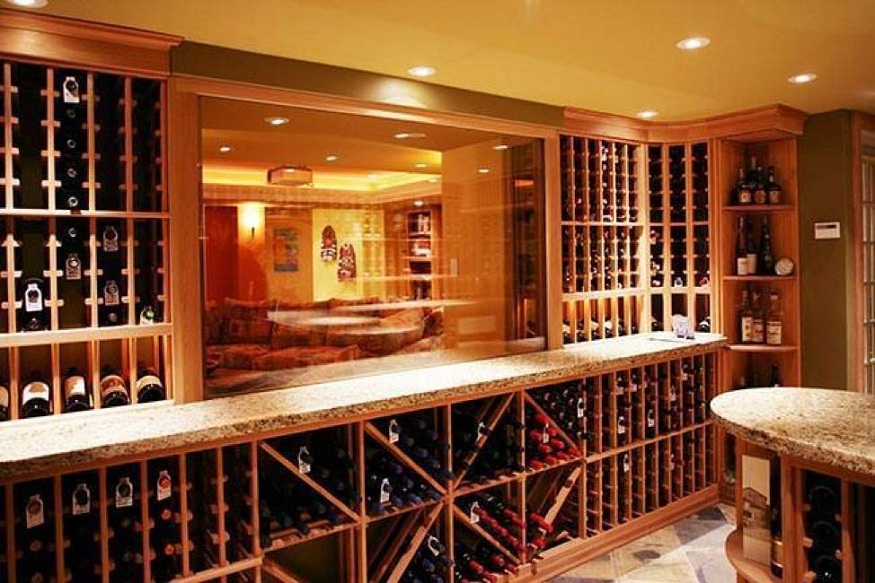
Step 1- Choose the Size and Style
As this rack can be placed anywhere in the house, it makes it easier for you to store the bottles, so before starting, ask yourself how many bottles you want to store and where you will place this rack.
Looks good on countertops (6–12 bottles)
- Medium Rack: Perfect fit for dining rooms or home bars, holds 12-24 bottles
- Multiple wine bottle racks: These range from small racks that hold up to 10 bottles, a few separate 24-bottle stackers, and one large Rack that stores more than 50 bottles.
Further, pick a style: horizontally stacked shelves, diamond-like compartments or wall-mounted designs.
Step 2: Gather Your Materials and Tools
- You’ll need:
- Wood: pine, oak or plywood will work
- Screws or nails
- Wood glue
- Sandpaper
- Measuring tape
- Saw (hand saw or electric)
- Drill
- Paint or wood finish (optional)
Step 3: Cut the Wood Pieces
Take the dimensions and start cutting the wood. For a basic horizontal rack:
- Two side panels
- Top and bottom panels
- Three-tier horizontal shelving with openings to keep the necks of the bottles
Since you want your bottles to lie on their side, each shelf should include regularly spaced half-circle notches that can accommodate a bottle neck.
Step 4: Assemble the Frame
- Next, secure the tops of both side panels with screws and use some wood glue to adhere them.
- Double-check to ensure everything is square and level before screwing the screws tight.
Step 5: Add the Shelves
- Insert shelves into place at regular intervals.
- Then, screw or nail them to the side panels.
- If you have the cutouts for the bottles, align them so they lie flat and don’t move.
Step 6: Sand and Finish
- You will want to sand all edges and surfaces as much as possible so you do not catch any splinters.
- If you prefer a more finished look, paint or stain the wood.
- If you worry that you will spill or want the surface to be water-resistant, apply a clear sealant.
Step 7 : Position And Load Your Rack
When it has dried completely, put the wine rack where you want it to be. Avoid direct sunlight and heat sources, as they can harm the wine. Store your bottles sideways to enable the corks to remain wet, maintaining the wine’s freshness.
Step 8: Add Anti-Slip Features
To prevent bottles from rolling or slipping, consider lining the shelves with non-slip padding or rubber strips. This is especially useful if the rack is placed on a slightly uneven surface or in a high-traffic area.
Step 9: Personalize Your Rack
Add a decorative touch by engraving, stenciling, or attaching a small chalkboard label to note the wine types or special dates. This not only makes your rack functional but also turns it into a stylish statement piece in your home.
Final Thoughts
Building a Wine Rack. Building your wine rack is one of those rewarding projects that allows you to have storage, style and a personal touch in your house. With some basic know-how and these few materials, you will be well on your way to a method of both keeping your wine and adding some character to the room.
Get your tools, follow the steps, and you’ll have a custom wine rack to display your favourite bottles before you know it. Cheers!